So, it is sometimes difficult to know where this or that dish comes from, but one thing is sure, tiramisu has its origin, our beautiful Italy! And that, we won’t steal their recipe, but we can copy it, and adapt it to our tastes, and our allergies; and that’s what we did! Here’s a gluten free tiramisu recipe that you’re going to love!
Usually, for Easter, we make chocolate eggs, well Gluten Libre has decided to change the codes! Here is the gluten free tiramisu recipe, to follow absolutely. We tested it, and completely validated it!

For the boudoirs, you’re gonna need:
- 3 eggs
- 60g of sugar
- 80g corn starch
- 5g of gluten-free assembly yeast
- 1 pinch of salt
And for all the gluten free tiramisu, here’s what you’re going to need:
- 250 grams of mascarpone.
- 2 eggs
- 1 tablespoon of sugar
- 2 coffees
- 20g sugar-free cocoa powder
- 1 pinch of salt
So let’s start by preparing your gluten free boudoirs:
STEP 1:The preparation: Separate the whites and yolks of your three eggs. Whisk your whites with a pinch of salt. When your whites are stiff, add little by little 3/4 of your sugar. Go gently, do not break your snow whites. In another bowl, blanch your yolks with the remaining quarter of the sugar. When everything is ready, gradually add your whites to the yolks. Use a wooden spatula to avoid any breakage! Finally, add your starch and yeast.
STEP 2: Assembly: preheat your oven to 180°. On a baking sheet with baking paper, make small piles with a spoon, and if you have a piping bag, it’s even better. Make “lines” of this preparation to make it look like real gluten-free boudoirs! And hop, you put it in a 180° oven for 10 to 12 minutes. When your boudoirs start to caramelize, take them out of the oven. Reserve.
Now let’s move on to our more general preparation:
STEP 1: Separate your whites from the yolks, and whisk your whites with a pinch of salt. In another bowl, mix your 3 egg yolks with the sugar, and mix this preparation with your mascarpone. When your two preparations are homogeneous, add little by little the egg whites to your mascarpone preparation. Taste it, it must be super super good!
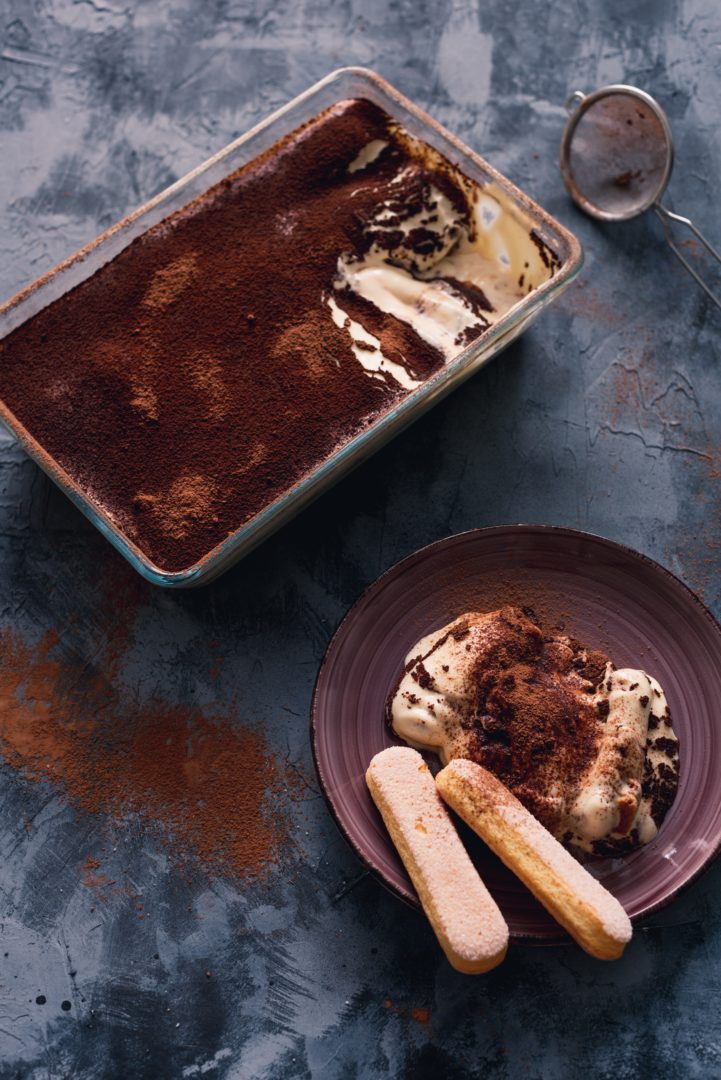
STEP 2: Assembly: When your gluten-free boudoirs have cooled down, gently dip them in cold coffee. Don’t completely soak your biscuit, just halfway. In a dish, put a first layer of boudoirs, then cover with half of your mascarpone preparation, then again put a layer of gluten-free coffee boudoirs, and finally cover with mascarpone. Tadaaaaaaa!
ETAPE 3: I almost forgot! Sprinkle your whole dish with cocoa, and then put plastic wrap on your gluten free tiramisu, and put it to the fridge for at least 3 hours.
Enjoy! So, not too bad, right?
If you want other recipes as good and simple, it’s this way!
Chloe